Embroidery stitches / Stem stitch
Stem stitch
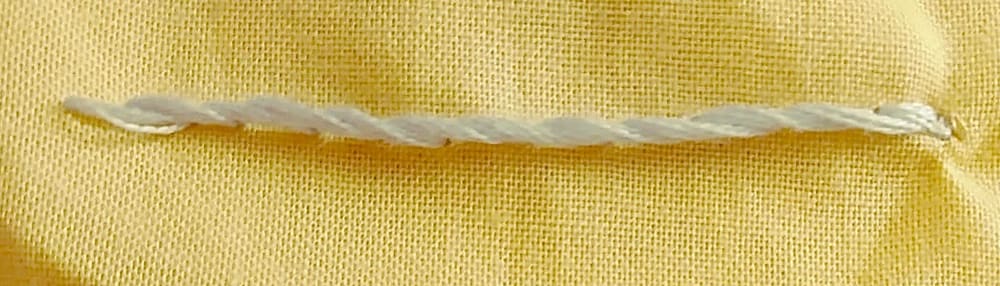
Stem stitch makes a smooth, slightly twisted line, ideal for stems, vines and curved outlines. Make one stitch along the line, then come up halfway back along it, just beside it, and make the next stitch the same length. Keep the thread on the same side of the needle every time. Aim for 4 mm (5/32 in) stitches that overlap by half.
- Beginner
- Line stitch
- 4 mm stitches, overlapping by half
Free practice sheet
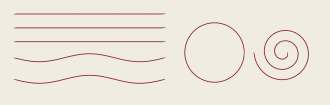
Straight lines, curves, a circle and a spiral, with a dot every 2 mm
Print at "Actual size" (100%), then check that the scale bar measures 5 cm, so the marks are true to size. Trace the lines onto fabric. Each stitch spans two dots (4 mm); come up at the dot in between.
In real thread
Before you start
- Needle: an embroidery (crewel) needle, size 7 to 9 for two or three strands. Its long eye takes floss easily.
- Strands: six-strand floss comes as six thin threads twisted together. Cut about 45 cm (18 in), pull out the strands you need one at a time, then lay them back together.
- Starting: for the first thread, tie a small knot at the end and come up from the back. For line stitches, a waste knot is neater: knot the end, go down on the front about 5 cm (2 in) away along your line, stitch toward it so your stitches cover the tail on the back, then cut the knot off.
- Finishing: on the back, slide the needle under three or four stitches, then trim. Once there are stitches on the back, start each new thread by sliding it under them too, without a knot.
Step by step
-
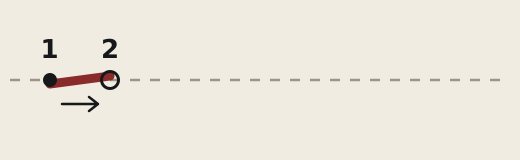
Bring the needle up at 1, at the start of the line, and go down at 2, one stitch length along.
-
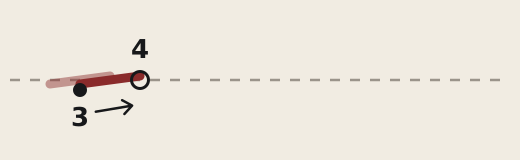
Hold the working thread below the line. Come up at 3, halfway back along the first stitch and just below it, then go down at 4, one stitch length on.
-
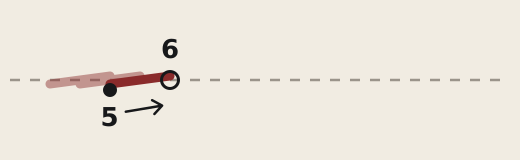
Come up at 5, at the end of the first stitch and again below the line, and go down at 6. Each new stitch starts halfway along the one before.
-
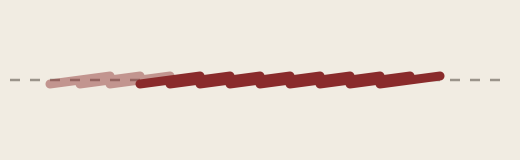
Repeat, always coming up halfway back and always keeping the thread on the same side, so the stitches overlap into a rope.
Filled dot: the needle comes up. Ring: the needle goes down. Arrow: the way the thread lies on the front.
Front and back
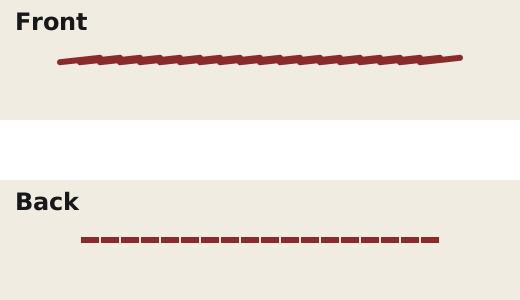
Each stitch goes down at its far end and comes up halfway back, so the back is a neat row of short stitches end to end: it looks like backstitch.
The back is drawn as if seen through the cloth, so its holes line up with the front.
Tips
- About 4 mm (5/32 in) stitches overlapping by half look smooth; on tight curves, shorten them to 2 mm (a little over 1/16 in).
- Keep the thread on the same side for the whole line. Switching sides changes the twist and the line looks broken.
- For a thicker line, angle each stitch slightly across the line, or work two rows side by side.
- Two or three strands of six-strand floss suit most stems; one strand for fine tendrils.
Common mistakes
- A line that looks like backstitch: the stitches are not overlapping. Come up halfway back along the last stitch, not at its end.
- A wobbly twist: the thread moved to the other side of the needle partway along.
- Jagged curves: the stitches are too long for the curve.
Patterns to use it on
- Embroidery letters
- Script names look smooth in stem stitch instead of backstitch; follow the same traced line.
Questions
- What is the difference between stem stitch and outline stitch?
- They are worked the same way except for where the thread lies: below the needle for stem stitch, above it for outline stitch. Some guides use the names the other way round, so pick one side and keep to it.
- What is the difference between stem stitch and split stitch?
- In stem stitch the needle comes up beside the previous stitch; in split stitch it comes up through the middle of it.
- Which way do I work stem stitch?
- Usually left to right along the line (right-handed). Turn the hoop so you always work in your comfortable direction.
More stitches


Sources
Updated