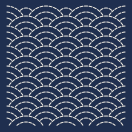
Sashiko patterns / Seigaiha (Blue Ocean Waves)
Seigaiha (wave) sashiko pattern
Seigaiha is rows of overlapping fan shapes, each made of three nested half circles. Each new row sits in front of the one above it, so only the top of each fan shows. Print the template at 100%, trace the arcs, and stitch each arc from end to end, one row at a time.
- Intermediate
- Panel 18 × 18 cm
- Stitches 3 mm, gaps 1.5 mm
Download the free template
Every size fills the same 18 cm square; the number is the wave radius. Smaller is denser and takes longer.
- 14 mmFine ~1,982 stitches · ~11 m thread · 3.5–6.5 h US Letter A4
- 20 mmClassic Recommended · ~1,453 stitches · ~8 m thread · 2.5–5 h US Letter A4
- 28 mmBold ~1,029 stitches · ~6 m thread · 1.5–3.5 h US Letter A4
Print at "Actual size" (100%), never "Fit to page", then check that the scale bar on the sheet measures 5 cm. Stitch and thread counts are estimates for the whole 18 cm panel (thread includes the back of the work and 15% for knots). Hours assume 5 to 10 stitches a minute. Page 2 of each PDF has the stitching order.
What you need
- Fabric: a 25 cm (10 in) square of medium-weight cotton or linen with a soft, even weave. That is the 18 cm panel plus room to hold it.
- Thread: about 8 m of sashiko thread at the recommended size, used as a single strand (check the length on your skein). Perle cotton no. 8 works too.
- Needle: a sashiko needle (long, with a large eye), or a long darning needle.
- Marker: a water-soluble fabric pen or a chalk pencil for tracing. Test it on a scrap first.
- Optional: a thimble. Sashiko is usually stitched in the hand, without a hoop, so the needle can take several stitches at once.
Time: about 2.5 to 5 hours for the whole panel at 20 mm, our estimate at 5 to 10 stitches a minute. A smaller piece takes less.
How to stitch it
New to sashiko? The running stitch guide shows how to load several stitches on the needle, the way sashiko is sewn, and how to start and finish a thread. Leave a little slack where the thread turns at the end of a row, so the fabric does not pucker.
- Trace the template onto your fabric with a light box or a sunny window and a fabric marker. On dark fabric such as indigo the lines won't show through: use white dressmaker's carbon paper instead.
-
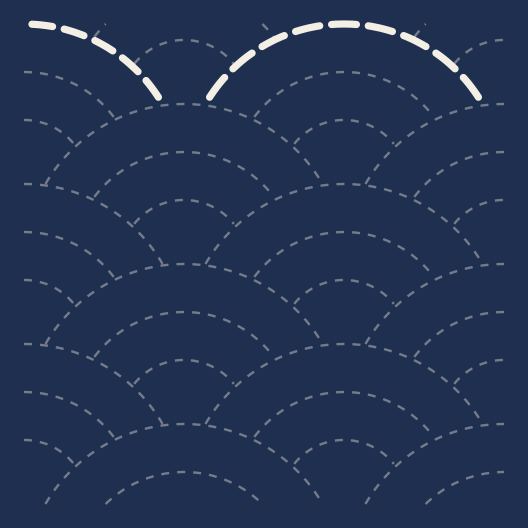
Start with the top row and stitch the outer arc of every fan.
-

Stitch the middle and inner arcs of the same row.
-
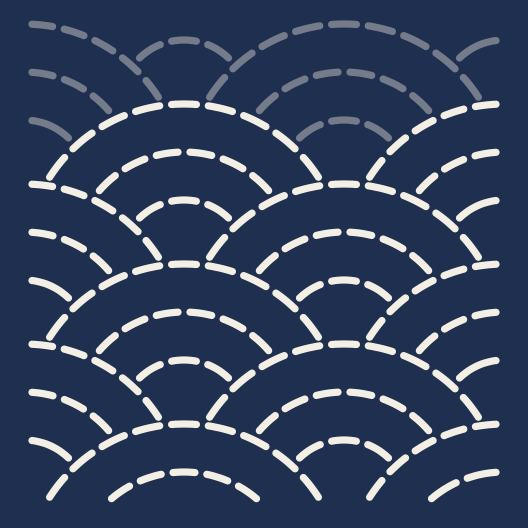
Move one row down and repeat; each row overlaps the one above.
- Keep every crossing point open: stop short of the point where lines meet, as the template shows, and start again just past it.
Bright: the stitches for this step. Faded: stitches already done. Dashed: lines still to stitch.
About this pattern
The endless rows of waves are read as a wish for lasting happiness and safe voyages.
Curves are harder than straight lines: keep stitches a little shorter on the smallest arcs so they follow the curve instead of cutting across it.
Where an arc disappears behind the next row, the template stops it short of the edge, so the front fan keeps a clean outline.
Questions
- How do I keep curved stitches even?
- Load only one or two stitches on the needle on tight curves, and follow the traced line rather than the weave of the fabric.
- Which size should I pick?
- The 20 mm wave is the easiest to stitch. The 14 mm size gives a fine, dense texture; the 28 mm size suits large pieces such as a cushion.
More sashiko patterns
Sources
Updated